%20--%3e%3csvg%20version='1.1'%20id='图层_1'%20xmlns='http://www.w3.org/2000/svg'%20xmlns:xlink='http://www.w3.org/1999/xlink'%20x='0px'%20y='0px'%20viewBox='0%200%20432%2092.5'%20style='enable-background:new%200%200%20432%2092.5;'%20xml:space='preserve'%3e%3cstyle%20type='text/css'%3e%20.st0{fill:%23F37332;}%20%3c/style%3e%3cg%3e%3cpath%20class='st0'%20d='M110.2,78.5V40.9c0-0.8-0.7-1.5-1.5-1.5H102c-0.8,0-1.5-0.7-1.5-1.5v-7.7c0-0.8,0.7-1.5,1.5-1.5h6.7%20c0.8,0,1.5-0.7,1.5-1.5v-1.6c0-5.7,2-10.2,6.1-13.3C120,9.4,125.7,8,133.4,8c1.3,0,2.7,0,4,0.1c1.1,0.1,1.7,0.1,1.7,0.1l0,0v11.4%20c-0.2,0-0.6-0.1-1.1-0.2s-1.1-0.1-1.8-0.1c-1.5,0-2.7,0.2-3.7,0.6c-2,0.8-3.1,2.8-3.1,6.1v1.2c0,0.8,0.7,1.5,1.5,1.5h6.7%20c0.8,0,1.5,0.7,1.5,1.5V38c0,0.8-0.7,1.5-1.5,1.5h-6.7c-0.8,0-1.5,0.7-1.5,1.5v37.6c0,0.8-0.7,1.5-1.5,1.5h-16.3%20C110.9,80,110.2,79.3,110.2,78.5z'/%3e%3cpath%20class='st0'%20d='M172.4,26.7c6.9,0,12.5,1,16.7,3.1c4.2,2,7.2,5.1,9.1,9.1c1.8,4,2.7,9.1,2.7,15.3c0,9.6-2.3,16.7-6.8,21.1%20S182.2,82,172,82c-6.4-0.1-11.7-1-15.9-3c-4.2-1.9-7.3-4.9-9.4-8.9c-2.1-4-3.1-9.3-3.1-15.7c0.1-9.1,2.5-16,7.4-20.6%20C156,29.1,163.1,26.7,172.4,26.7z%20M162.1,54.2c0.2,3.9,0.4,6.8,0.8,8.9c0.3,2.1,1.3,3.9,2.8,5.5s3.8,2.4,6.9,2.4%20c3,0,5.3-0.8,6.7-2.4s2.3-3.5,2.7-5.7c0.3-2.2,0.5-5,0.5-8.5c0-5.2-0.6-9.3-1.7-12.3c-1.1-3-3.9-4.5-8.2-4.5%20c-3.1,0-5.4,0.8-6.9,2.4c-1.5,1.6-2.5,3.5-2.9,5.8C162.3,48,162.1,50.8,162.1,54.2z'/%3e%3cpath%20class='st0'%20d='M208.2,28.9h19.6c0.5,0,1,0.3,1.2,0.7l6.1,9.4c0.6,0.9,1.9,0.9,2.5,0l6-9.4c0.3-0.4,0.7-0.7,1.2-0.7h12.8%20c1.2,0,1.9,1.3,1.2,2.3l-14,21.6c-0.3,0.5-0.3,1.1,0,1.6l15.3,23.4c0.6,1-0.1,2.3-1.2,2.3h-19.6c-0.5,0-1-0.3-1.2-0.7l-7.4-11.8%20c-0.6-0.9-1.9-0.9-2.5,0l-7.5,11.8c-0.3,0.4-0.7,0.7-1.2,0.7h-12.7c-1.2,0-1.8-1.3-1.2-2.2l15.1-24c0.3-0.5,0.3-1.1,0-1.6L207,31.1%20C206.4,30.1,207.1,28.9,208.2,28.9z'/%3e%3cpath%20class='st0'%20d='M294.1,26.7c6.9,0,12.5,1,16.7,3.1c4.2,2,7.2,5.1,9.1,9.1c1.8,4,2.7,9.1,2.7,15.3c0,9.6-2.3,16.7-6.8,21.1%20S303.9,82,293.7,82c-6.4-0.1-11.7-1-15.9-3c-4.2-1.9-7.3-4.9-9.4-8.9s-3.1-9.3-3.1-15.7c0.1-9.1,2.5-16,7.4-20.6%20C277.7,29.1,284.8,26.7,294.1,26.7z%20M283.8,54.2c0.2,3.9,0.4,6.8,0.8,8.9c0.3,2.1,1.3,3.9,2.8,5.5s3.8,2.4,6.9,2.4%20c3,0,5.3-0.8,6.7-2.4c1.4-1.6,2.3-3.5,2.7-5.7c0.3-2.2,0.5-5,0.5-8.5c0-5.2-0.6-9.3-1.7-12.3s-3.9-4.5-8.2-4.5%20c-3.1,0-5.4,0.8-6.9,2.4c-1.5,1.6-2.5,3.5-2.9,5.8C284,48,283.8,50.8,283.8,54.2z'/%3e%3cpath%20class='st0'%20d='M329.8,78.5V30.3c0-0.8,0.7-1.5,1.5-1.5h16.4c0.8,0,1.5,0.7,1.5,1.5v3.9c0,0,0.3-0.4,0.9-1.1%20c0.5-0.7,1.3-1.4,2.4-2.1c1-0.7,2.4-1.3,4.2-1.9c2-0.6,4.2-0.9,6.8-0.9c1.7,0,3.2,0.1,4.3,0.2c0.6,0.1,1.1,0.6,1.2,1.2l1.4,8.1%20c0.2,1-0.8,1.9-1.8,1.7c-2.1-0.5-4.2-0.8-6.4-0.8c-2.5,0-4.7,0.4-6.4,1.2c-4.4,2-6.6,5.3-6.6,9.8v28.8c0,0.8-0.7,1.5-1.5,1.5h-16.4%20C330.4,80,329.8,79.3,329.8,78.5z'/%3e%3cpath%20class='st0'%20d='M406.4,78.7L406.4,78.7c0-1.2-1.4-1.9-2.4-1.1c-0.4,0.3-0.9,0.7-1.4,1c-2.1,1.4-5.6,2.2-10.4,2.4%20c-4.7,0-8.8-1.2-12.3-3.7s-5.3-6.1-5.4-10.9c0-5.2,1.7-9,5.1-11.4c3.4-2.3,8.5-4,15.4-5c3.8-0.5,6.6-1.3,8.5-2.6%20c1.9-1.2,2.9-2.6,2.9-4c0-1.3-0.8-2.5-2.5-3.5c-1.6-1-3.7-1.5-6.3-1.5c-5.9,0-10.5,0.8-13.9,2.5c-1.3,0.7-2.5,1.3-3.5,1.8%20c-1.1,0.7-2.5-0.4-2.1-1.7l2.2-8c0-0.2,0.9-0.7,2.6-1.5s4.2-1.5,7.3-2.2c3.1-0.7,6.8-1,11-1c8.6,0,14.8,1.5,18.7,4.6%20c3.8,3,5.8,6.8,5.8,11.2v34.6c0,0.8-0.6,1.5-1.4,1.5l-16.4,0.1C407,80.1,406.4,79.5,406.4,78.7z%20M399.3,69.9%20c2.7-0.6,4.5-1.7,5.5-3.2s1.5-2.6,1.5-3.3v-7.8c-0.1,0.1-0.3,0.4-0.7,0.9c-0.4,0.5-1.2,1.1-2.5,1.7c-1.3,0.6-3.1,1.1-5.5,1.5%20c-3,0.5-5.2,1.2-6.5,2.2s-1.9,2.6-1.9,4.8c0,0.1,0,0.2,0,0.3c0.4,2.2,2.3,3.4,5.8,3.4C395.8,70.5,397.2,70.3,399.3,69.9z'/%3e%3c/g%3e%3cpath%20class='st0'%20d='M66.8,27.1c-0.3,0.2-0.7,0.4-1,0.4H51.4H37c-0.4,0-0.8-0.1-1-0.4L14.6,9c-0.9-0.8-2.5-0.2-2.5,0.9v46.6%20c0,0.5,0.3,0.9,0.7,1.1l37.8,19.7c0.5,0.2,1.1,0.2,1.5,0l37.8-19.7c0.4-0.2,0.7-0.7,0.7-1.1V9.9c0-1.1-1.6-1.7-2.5-0.9L66.8,27.1z'%20/%3e%3cpolygon%20class='st0'%20points='92.6,67.9%2051.4,82.6%2010.2,67.9%207.4,79.6%2051.4,87%2095.4,79.6%20'/%3e%3c/svg%3e)
In this tutorial, we'll walk you through designing a custom mailer box with the Foxora online packaging editor. You'll learn how to set dimensions, create a dieline, add artwork, customize the interior, and preview your design in 3D. No software installation is required.
Open the Packaging Editor
Go to the Foxora website and click Open Editor to launch the online packaging design workspace.
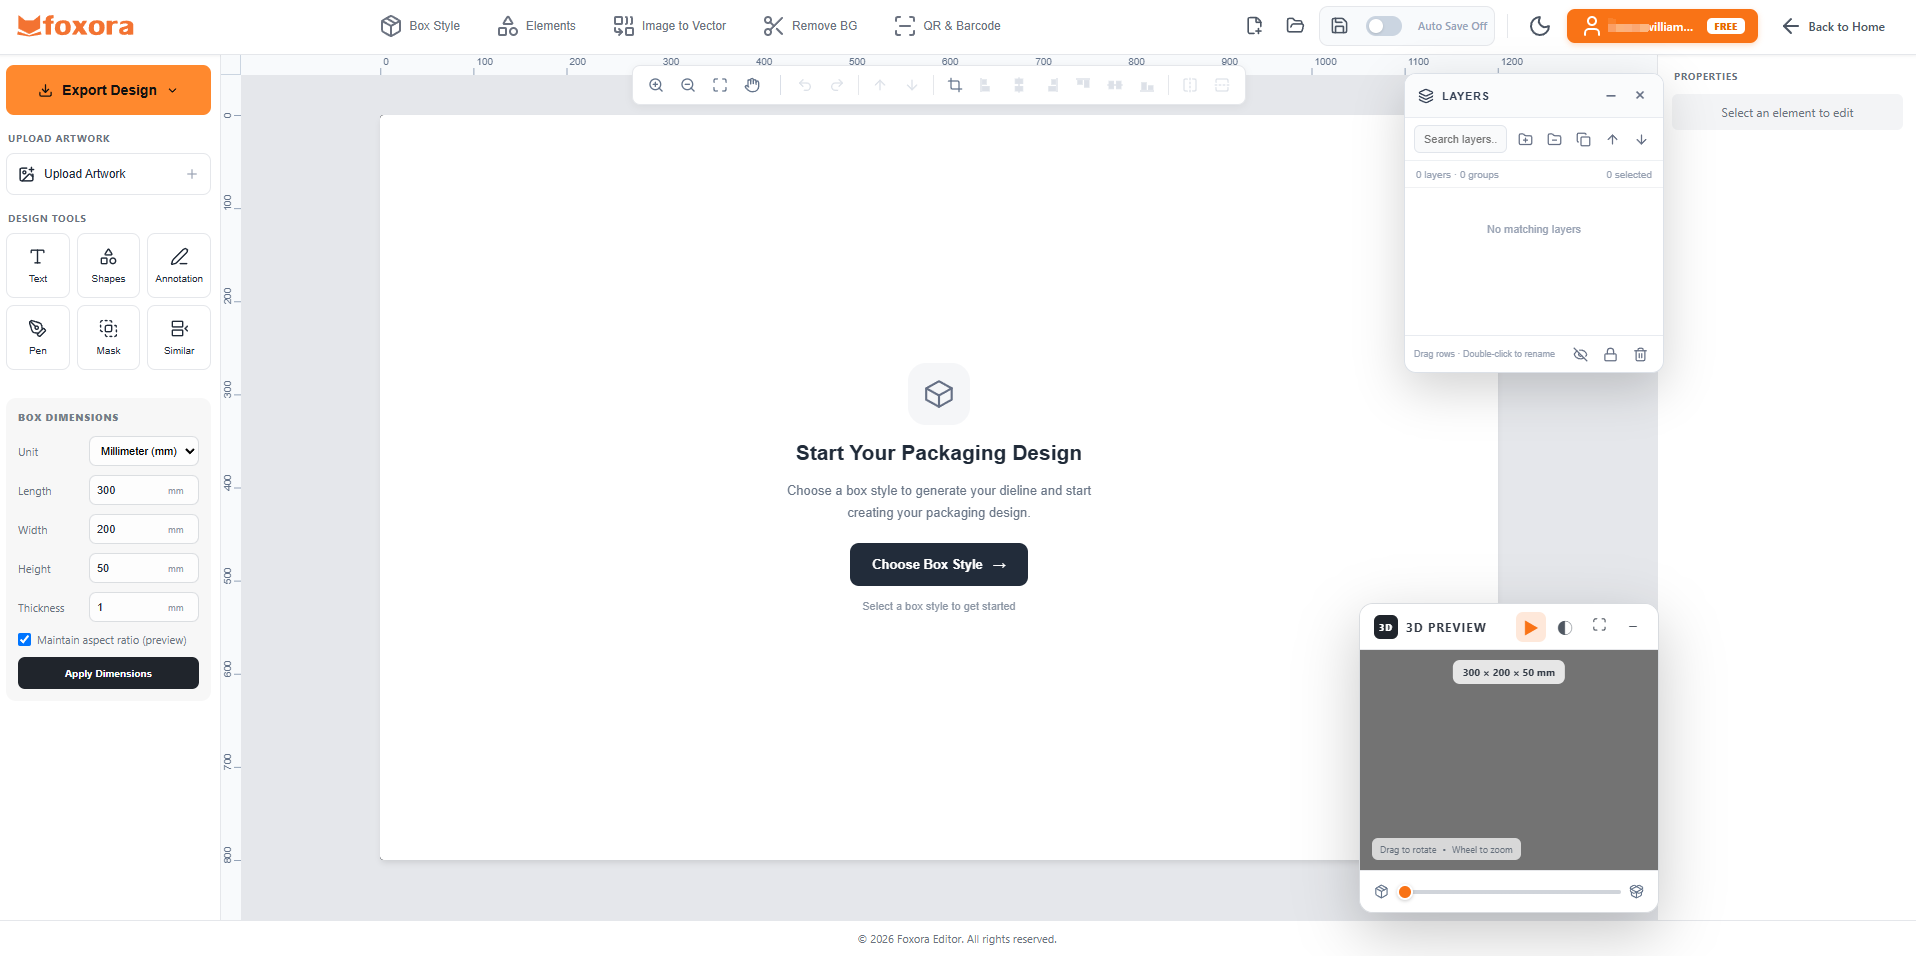
Choose the Mailer Box Style
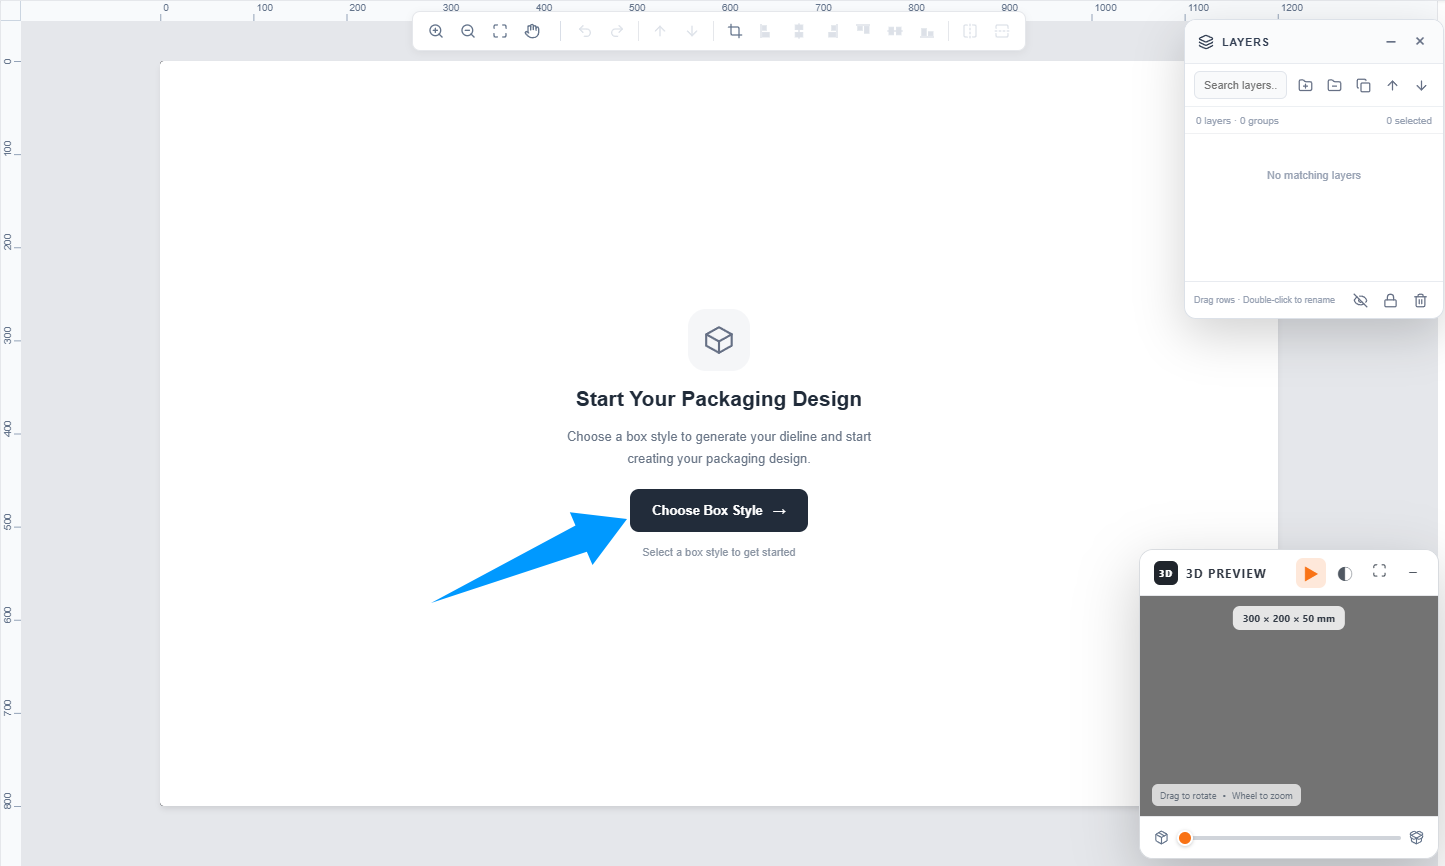
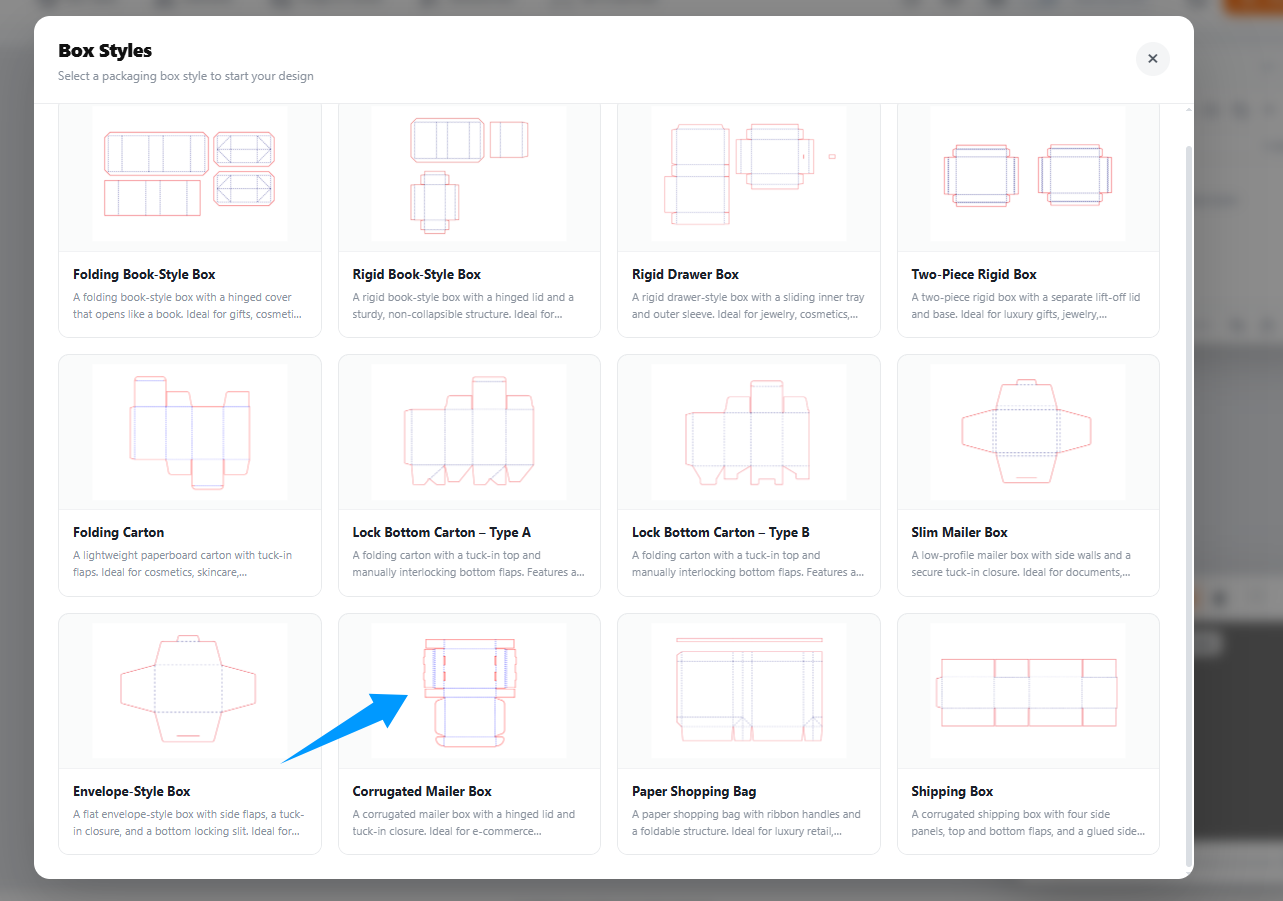
Click Box Style in the editor's top toolbar, then select Mailer Box from the available packaging styles.
Set Your Custom Dimensions
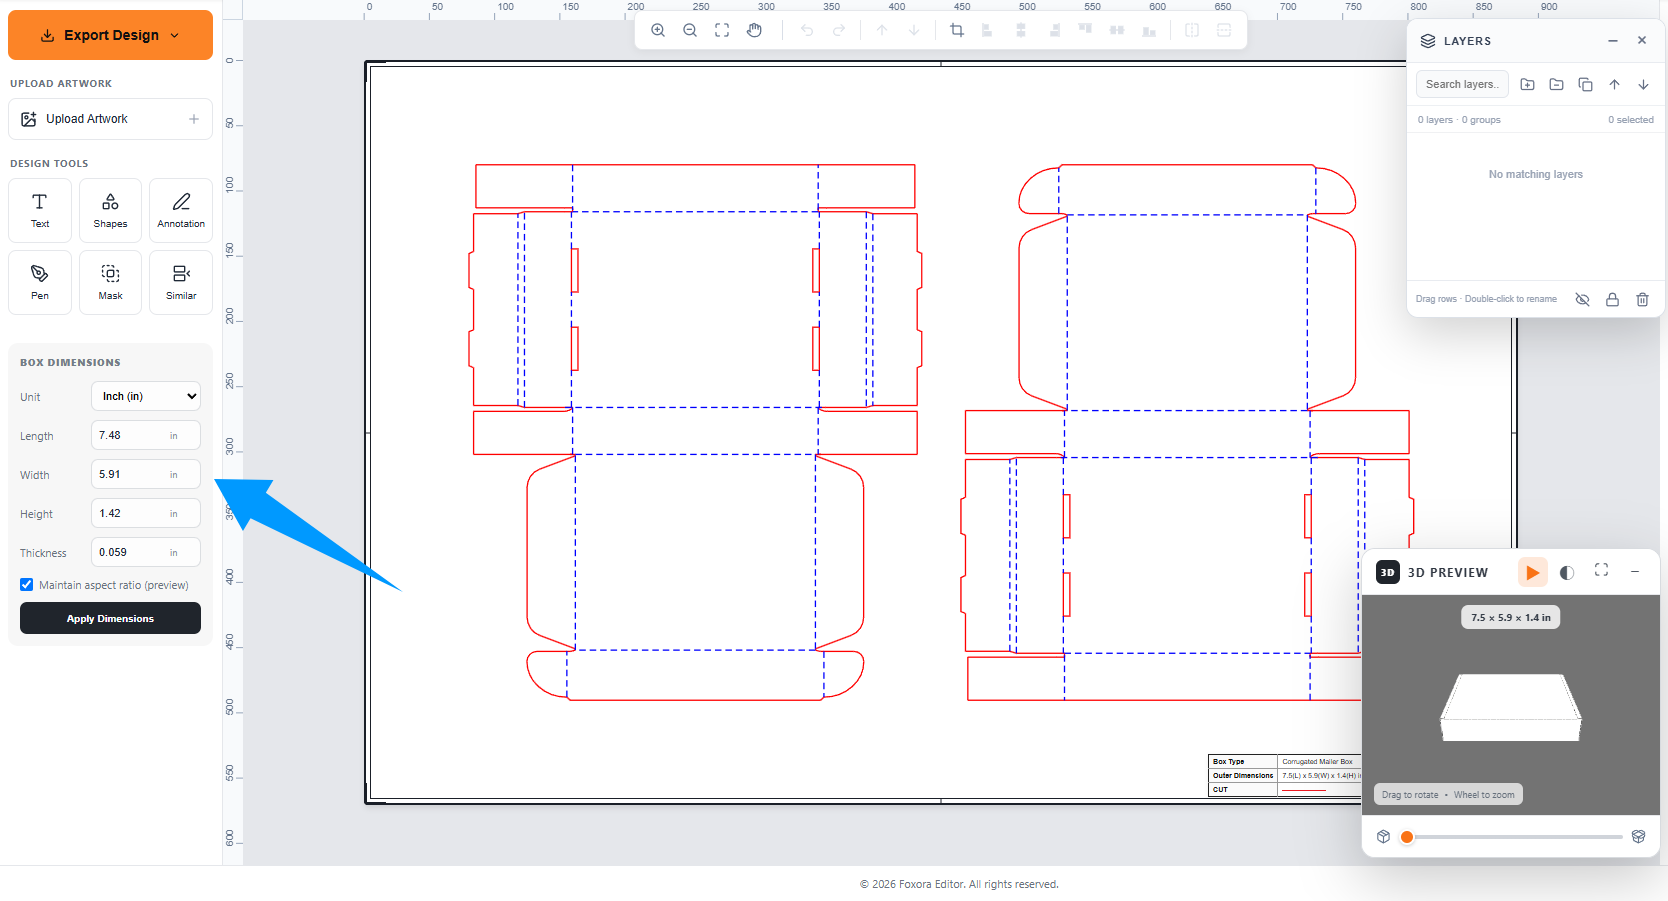
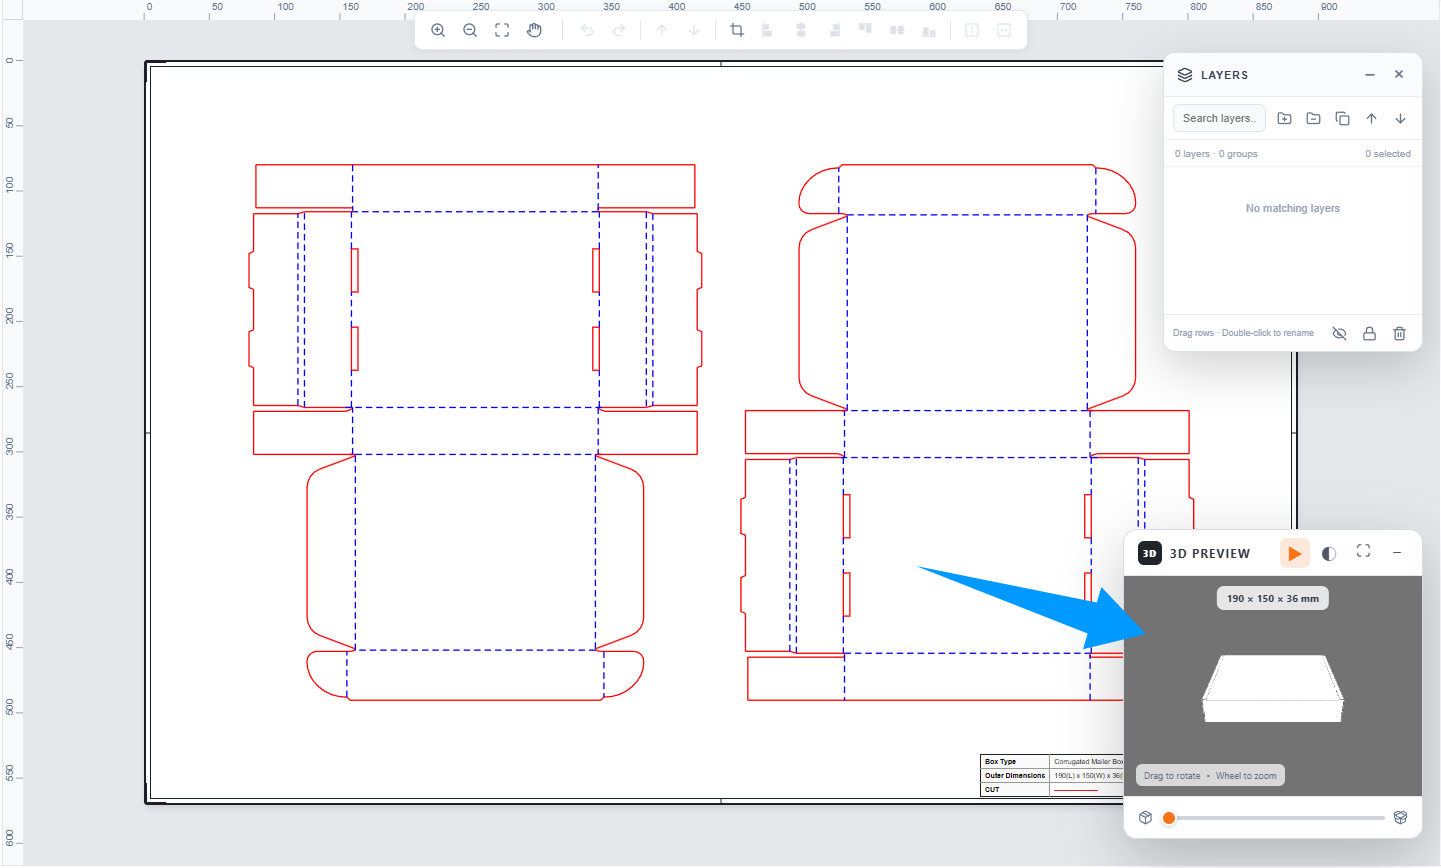
Enter your desired box dimensions. For this example, use 190 mm Length × 150 mm Width × 80 mm Height with a material thickness of 1.5 mm.
Generate Your Box Dieline
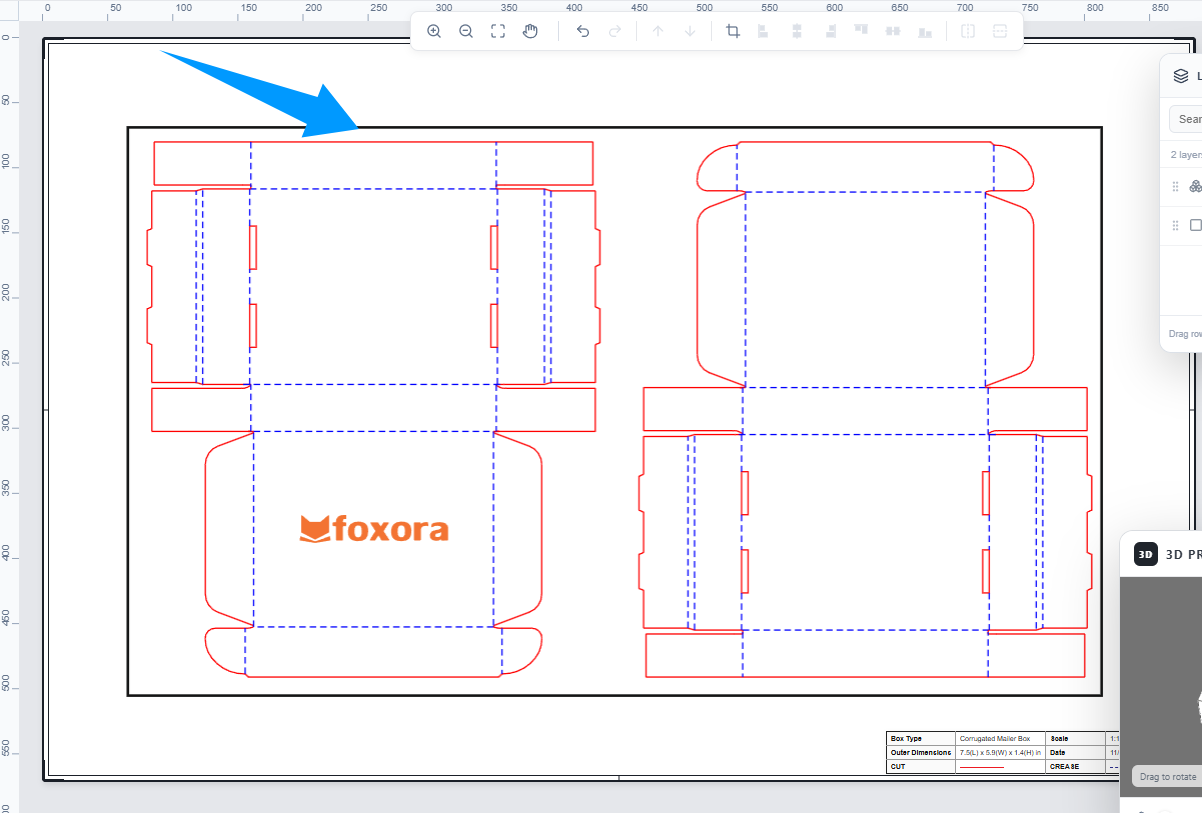
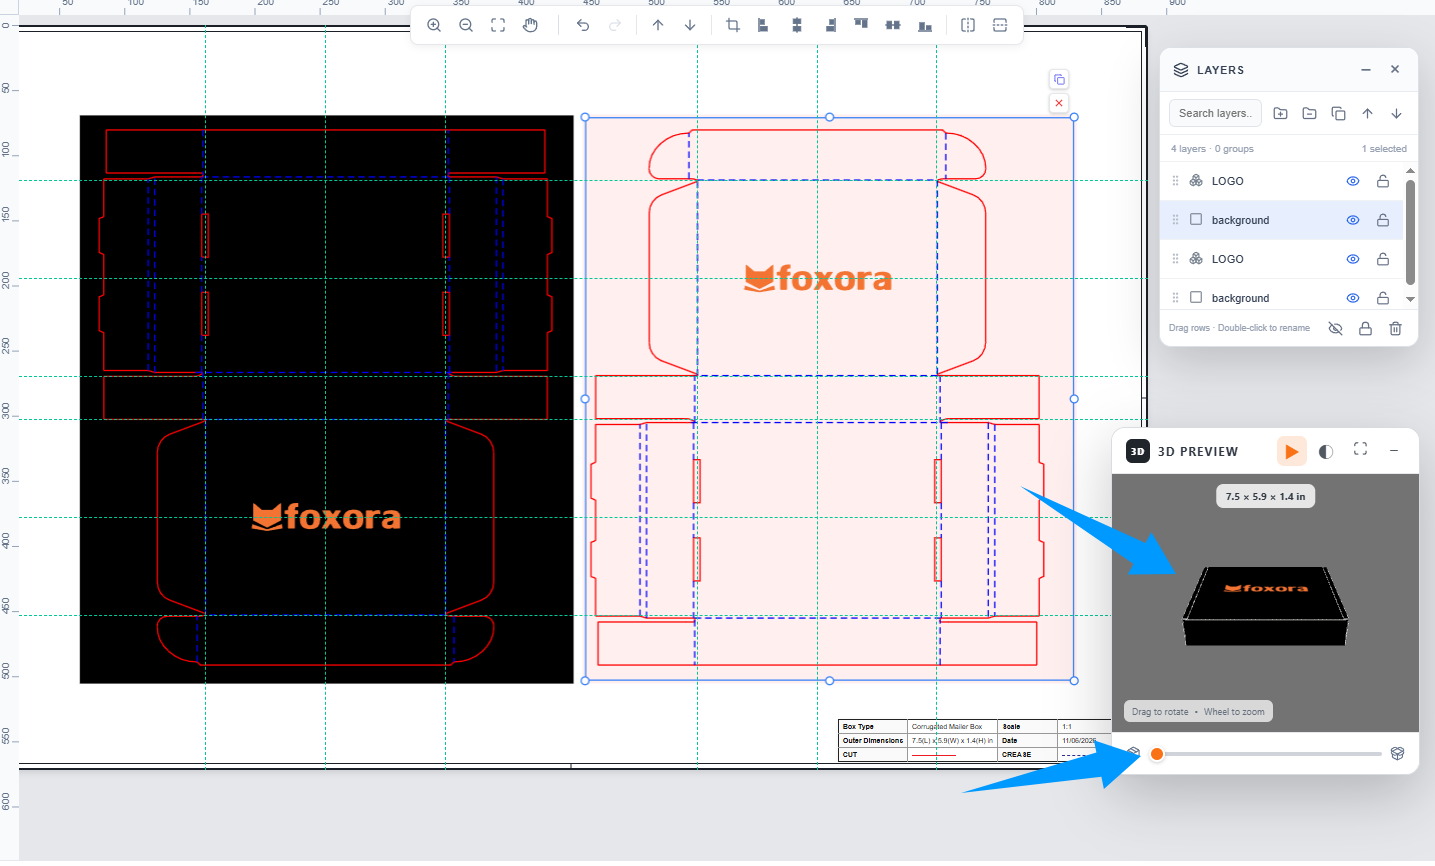
Apply your dimensions to generate the flat packaging dieline. A 3D Preview of the Mailer Box will appear in the bottom-right corner of the editor, allowing you to view the assembled box while designing.
Add Your Logo and Artwork
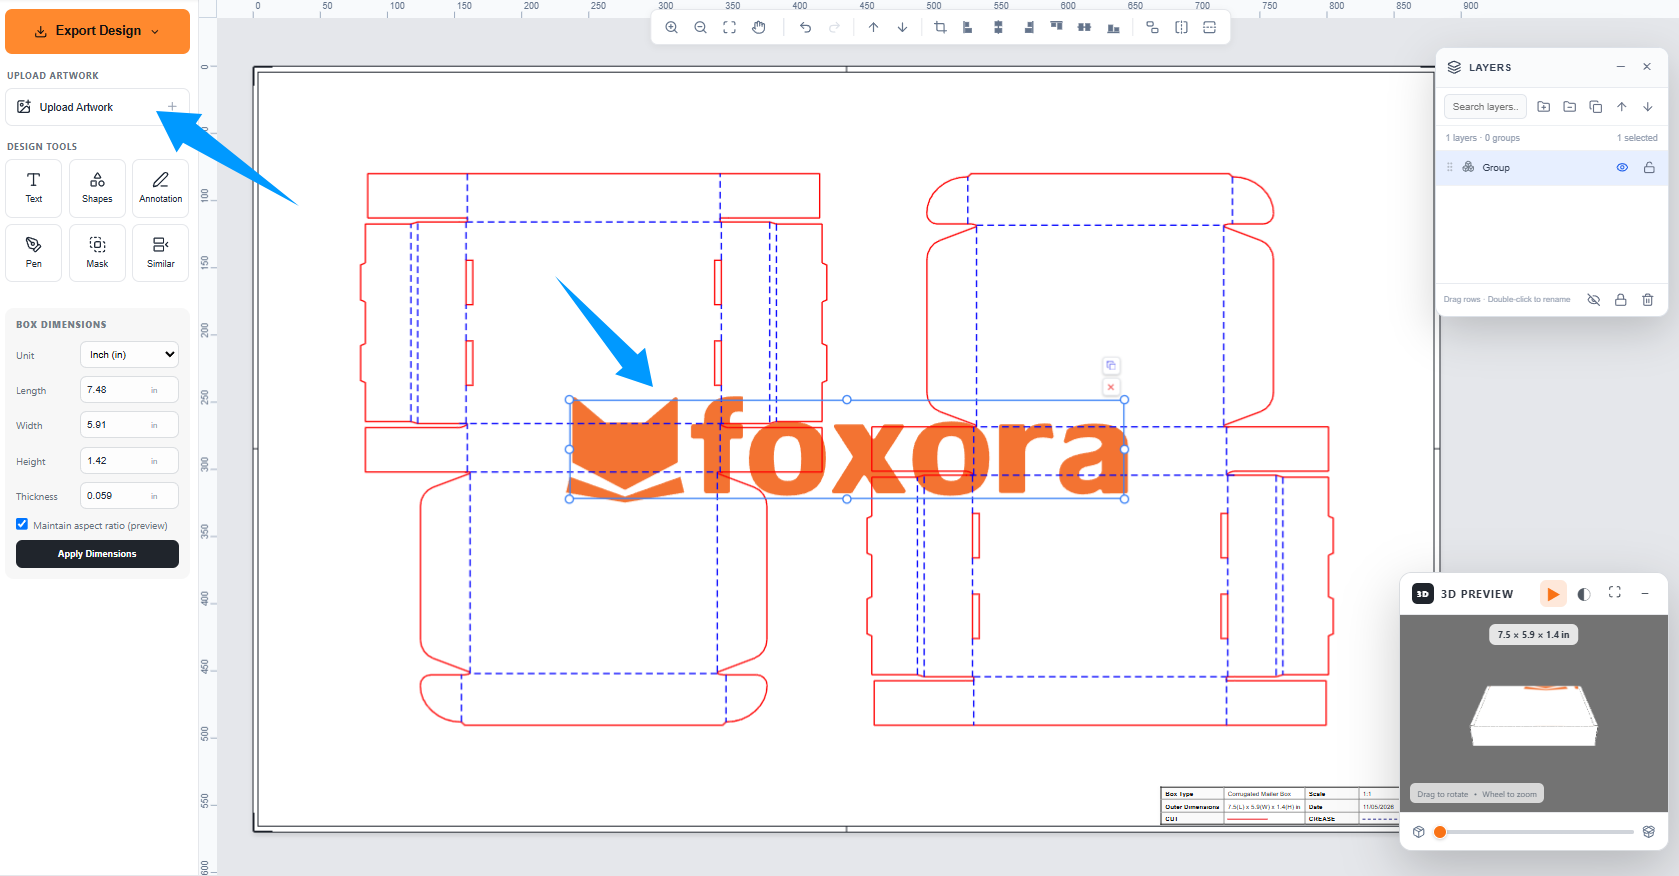
Use the editor's upload tools to add your logo, graphics, or product images. Position your artwork on the appropriate panels of the packaging dieline.
Add a Background Color to Your Box
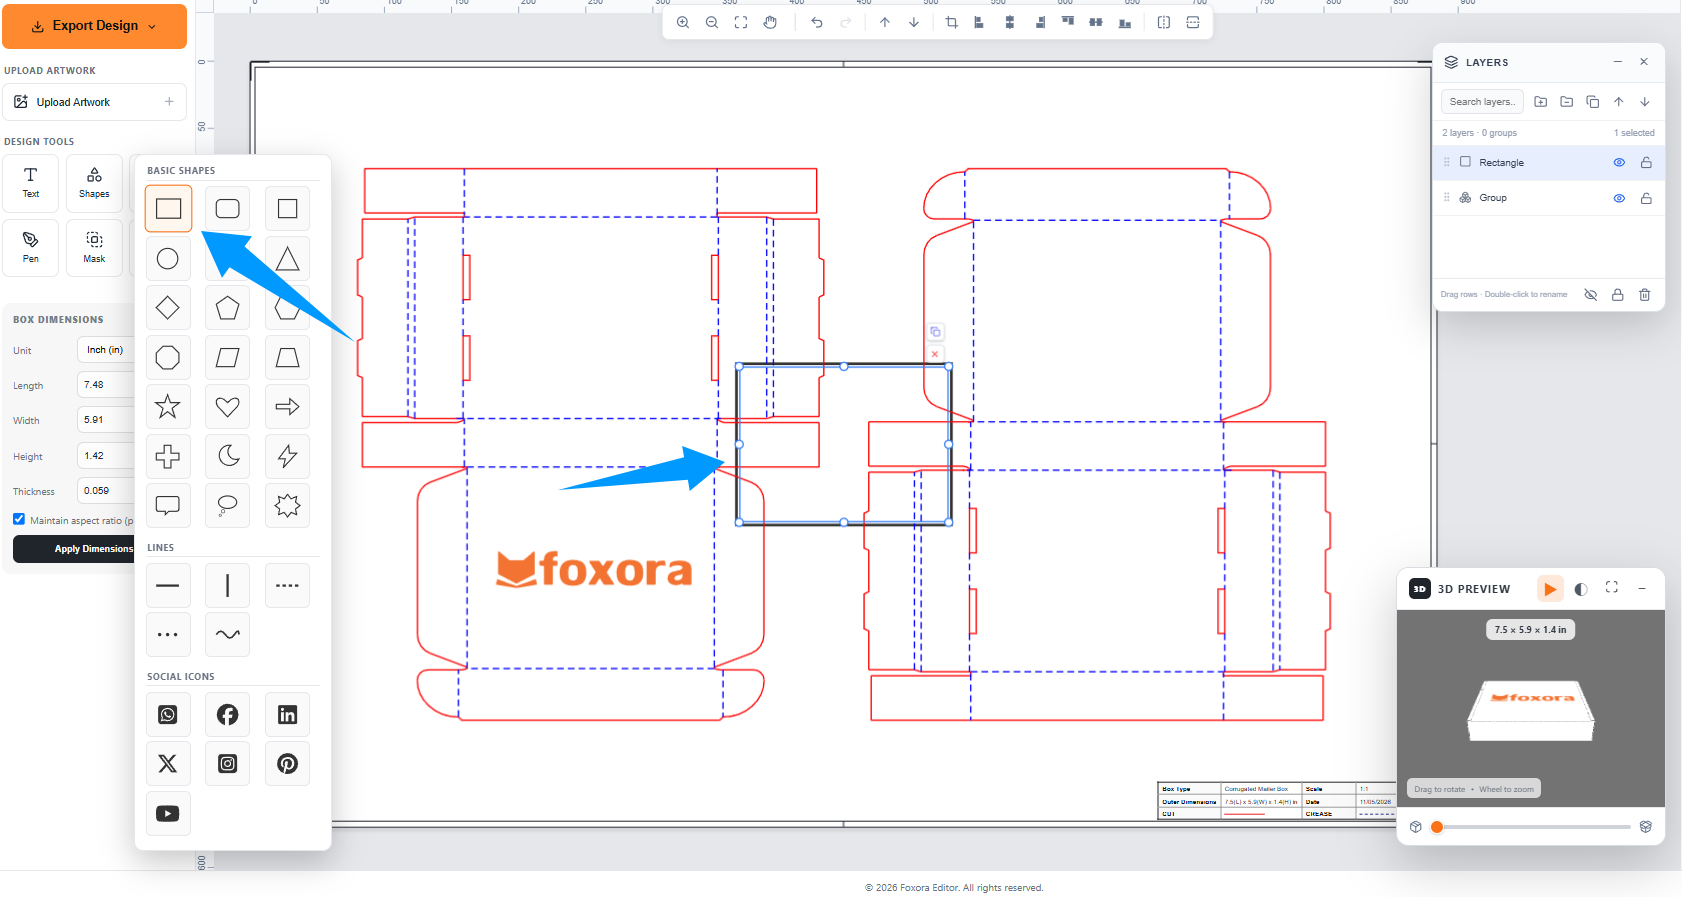
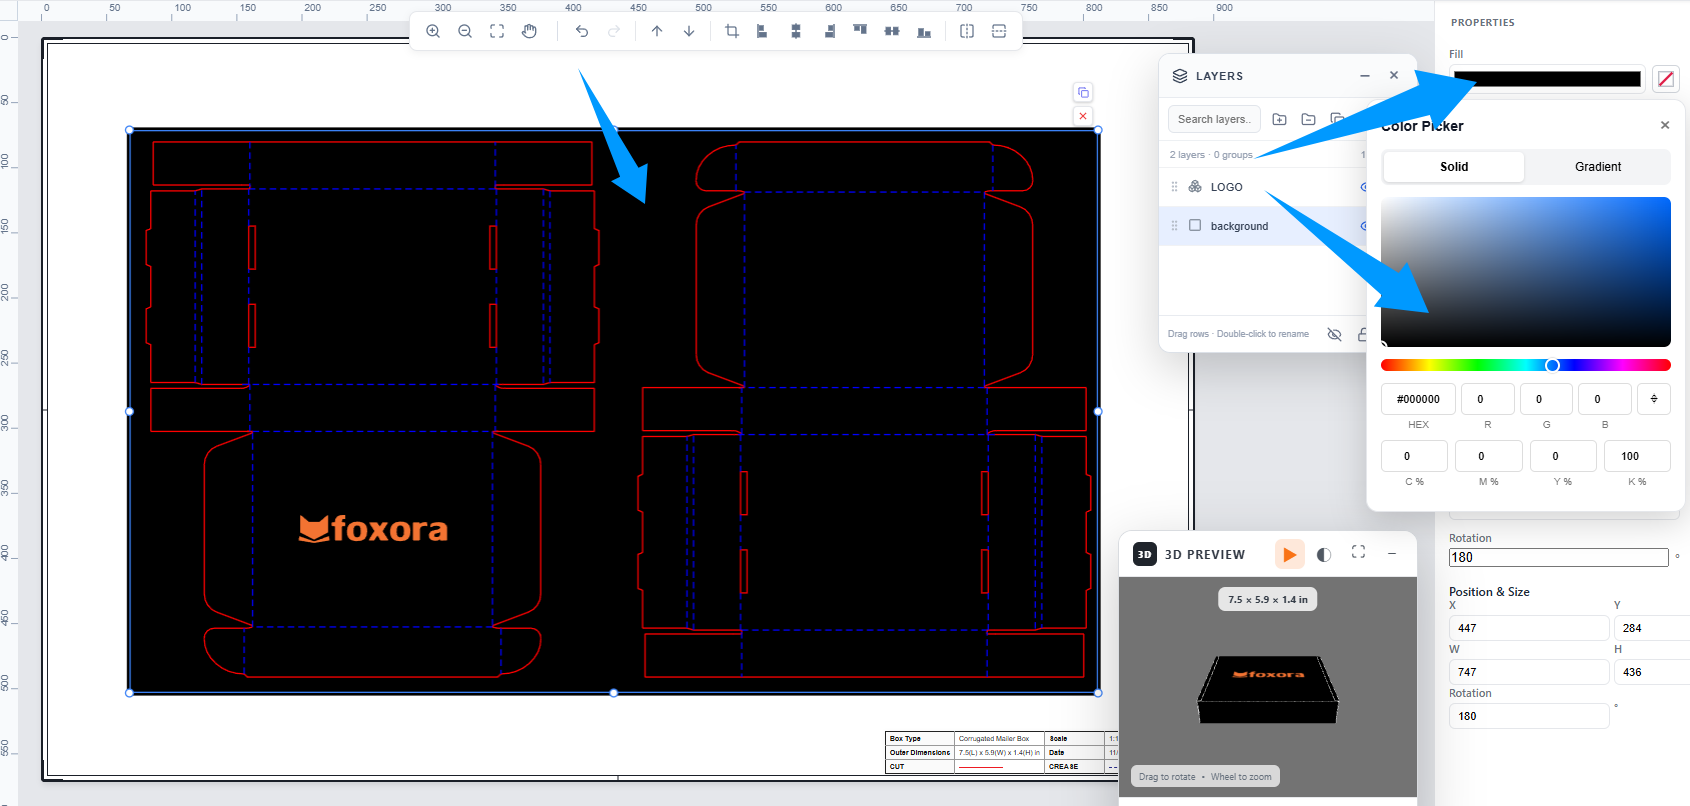
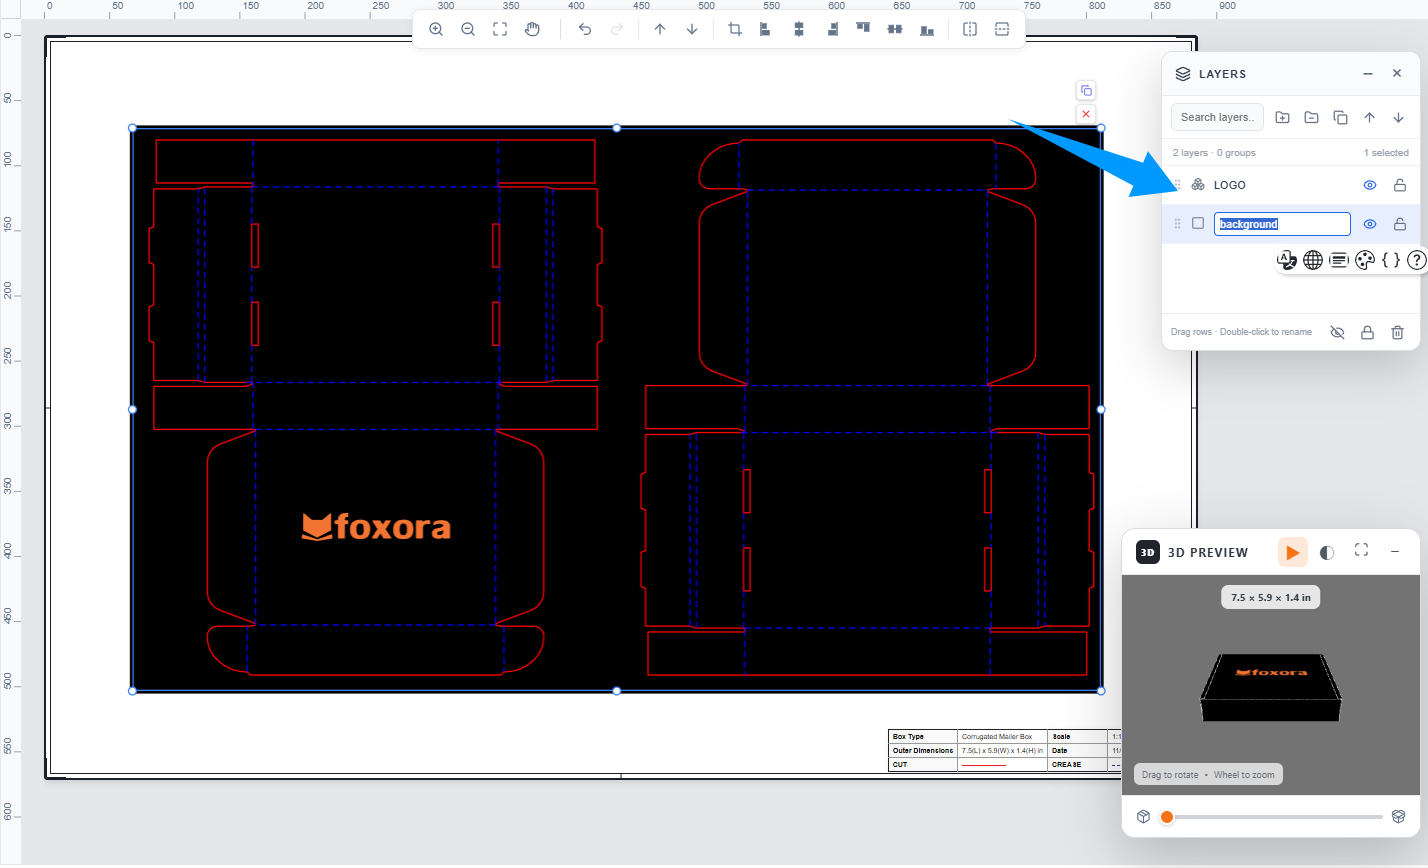
Use the Shapes tool to add a rectangle, resize it to cover the box dieline, and choose a background color. You can also use the Layers panel to organize your design elements.
Align Your Design with Guides
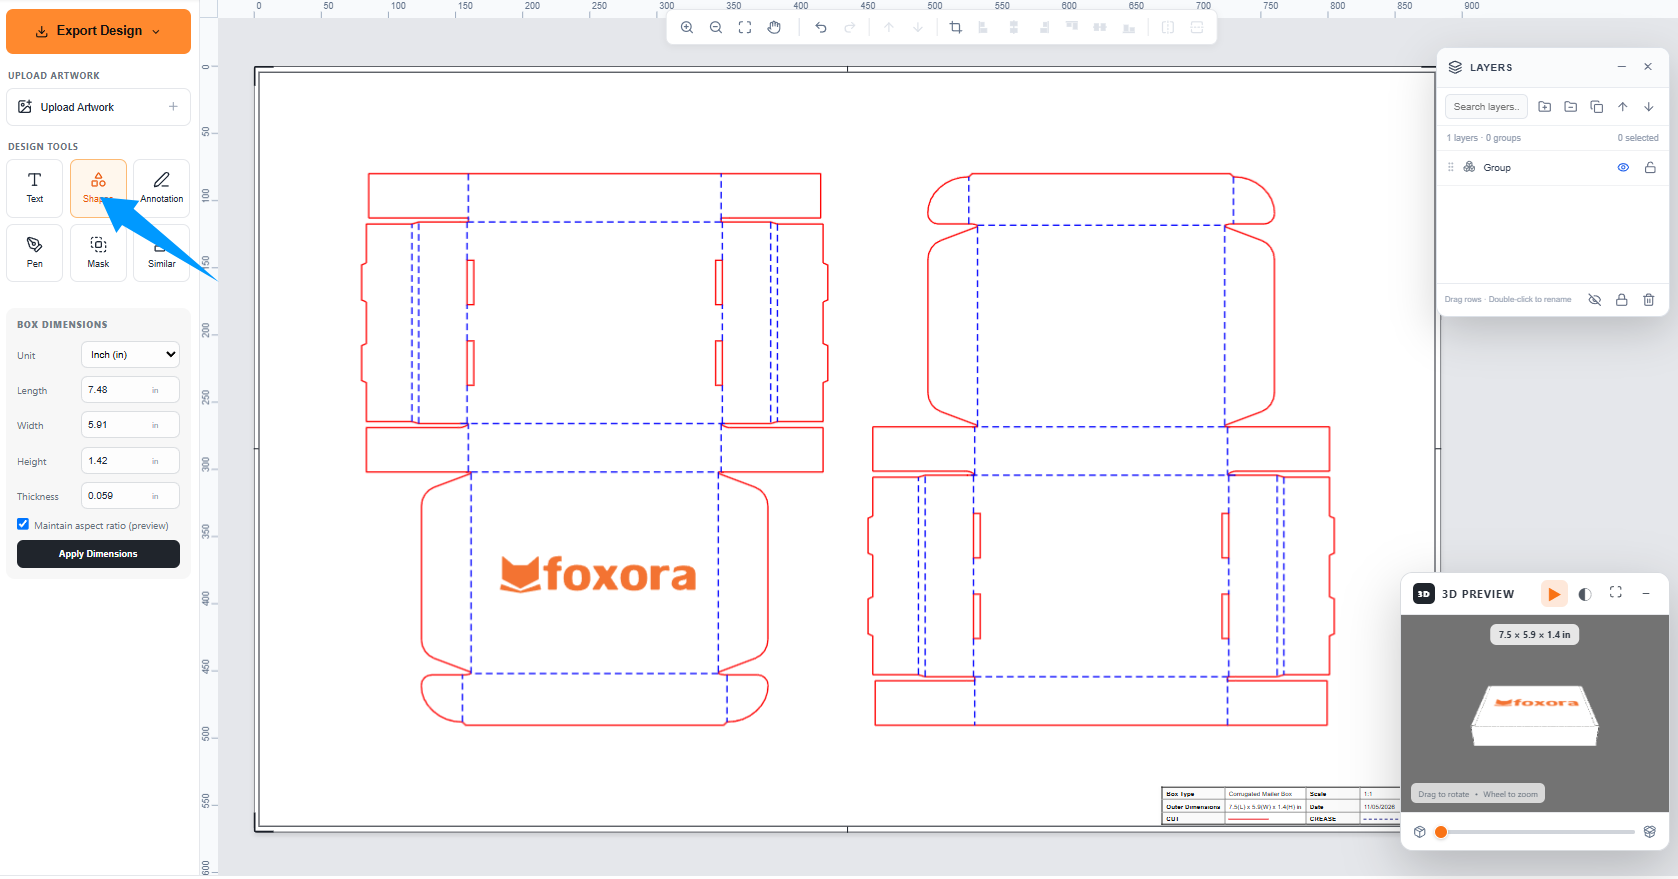
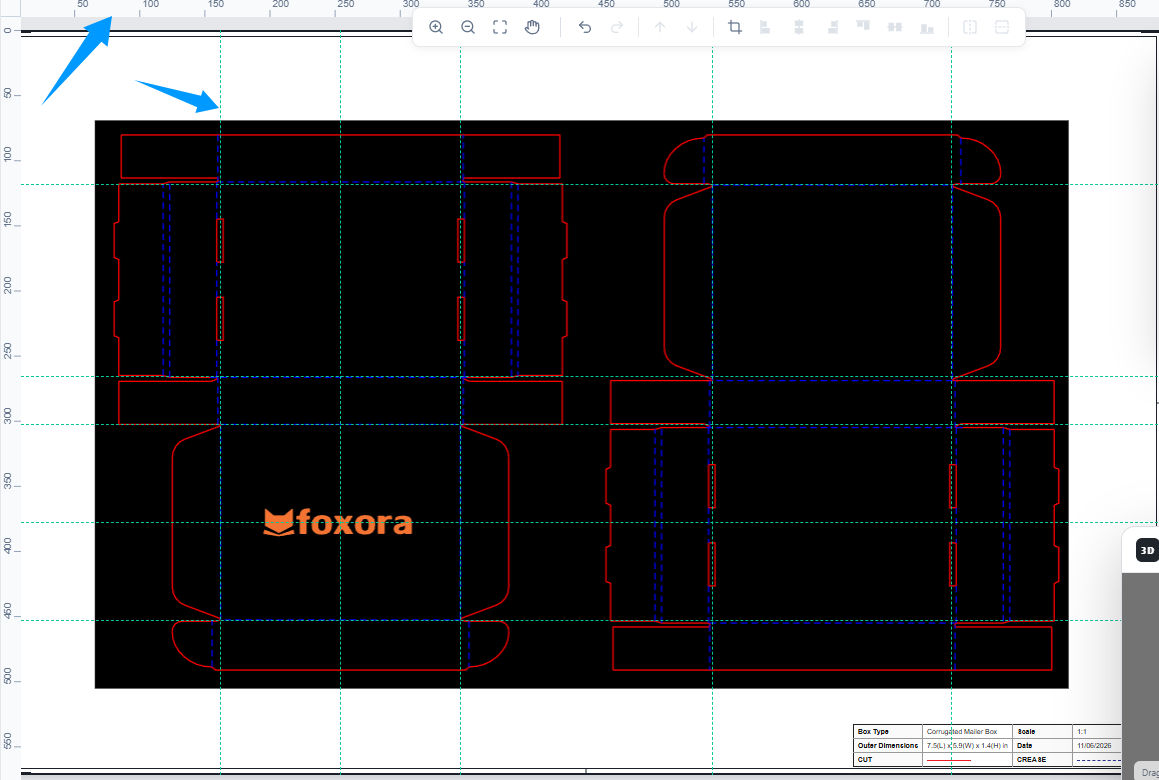
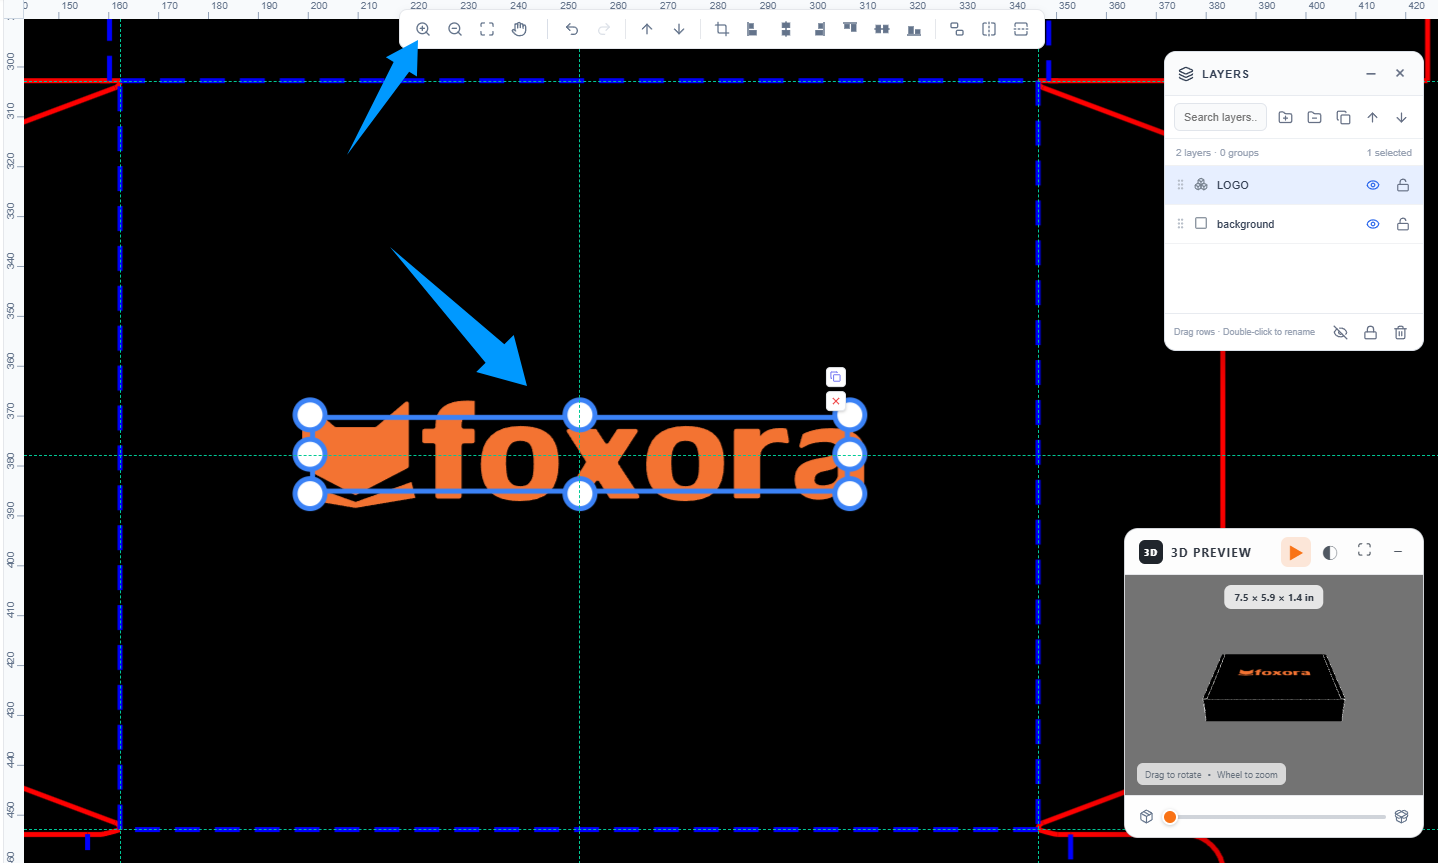
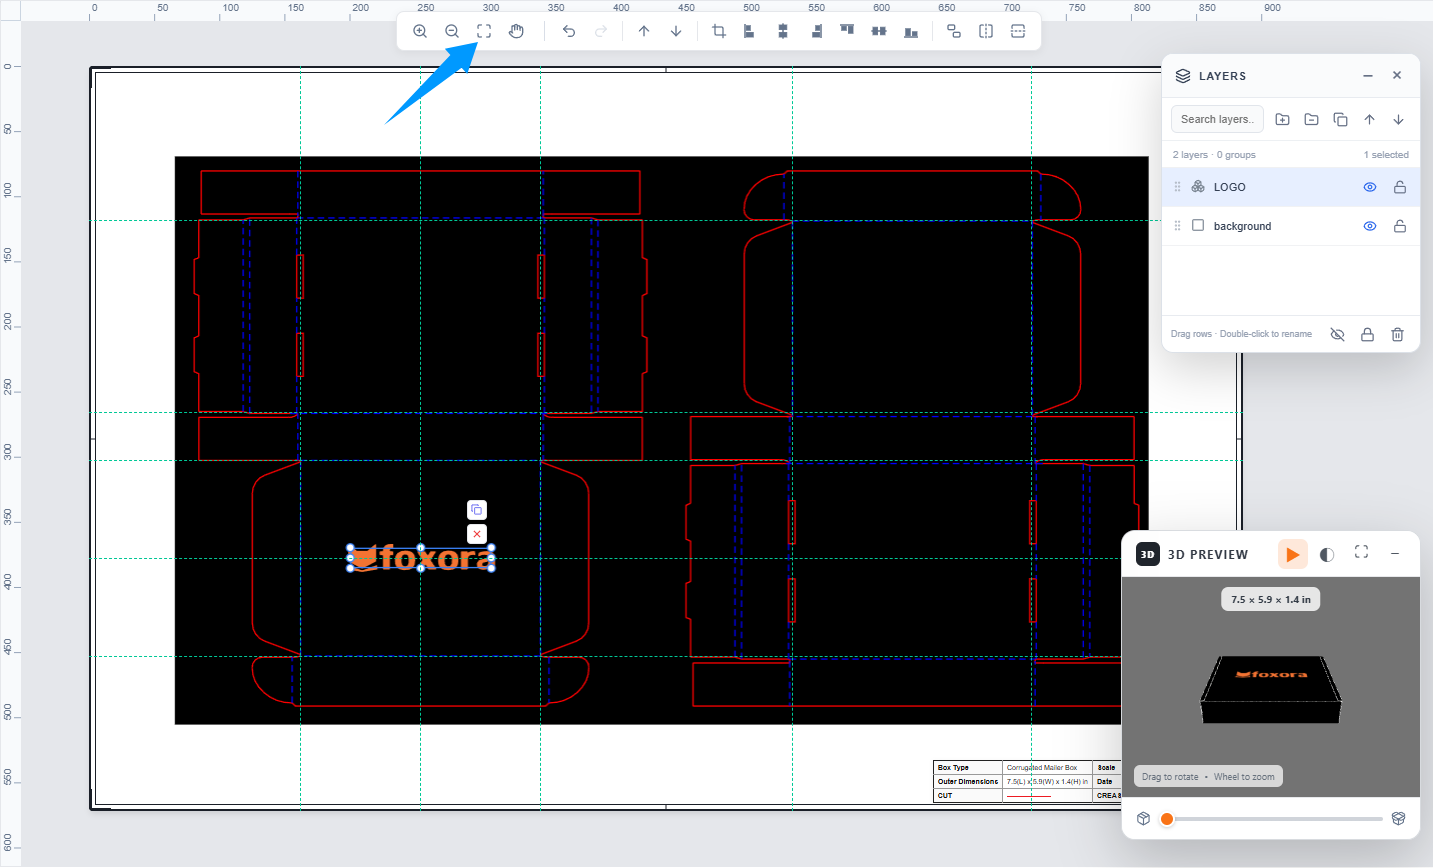
Use Guides and the Zoom tool to center and align your logos, text, and other design elements on the packaging panels.
Customize the Inside of Your Mailer Box
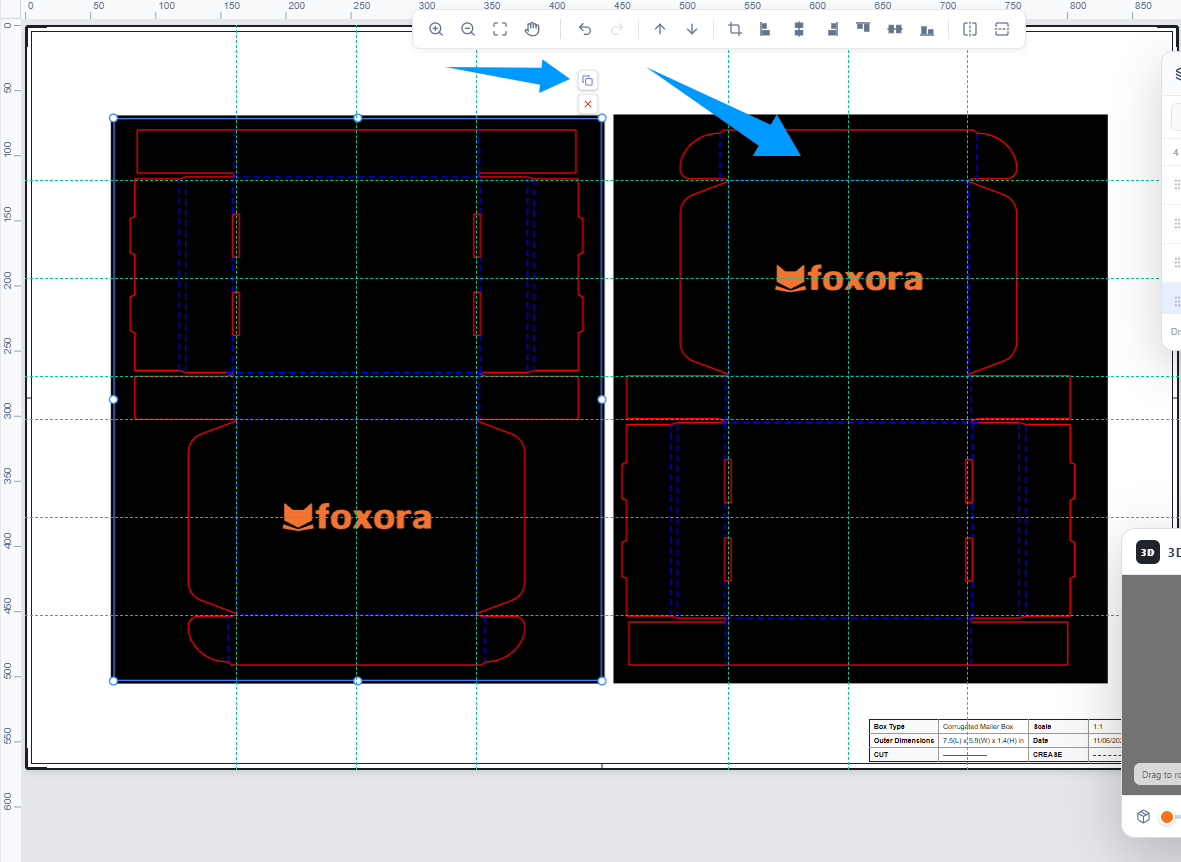
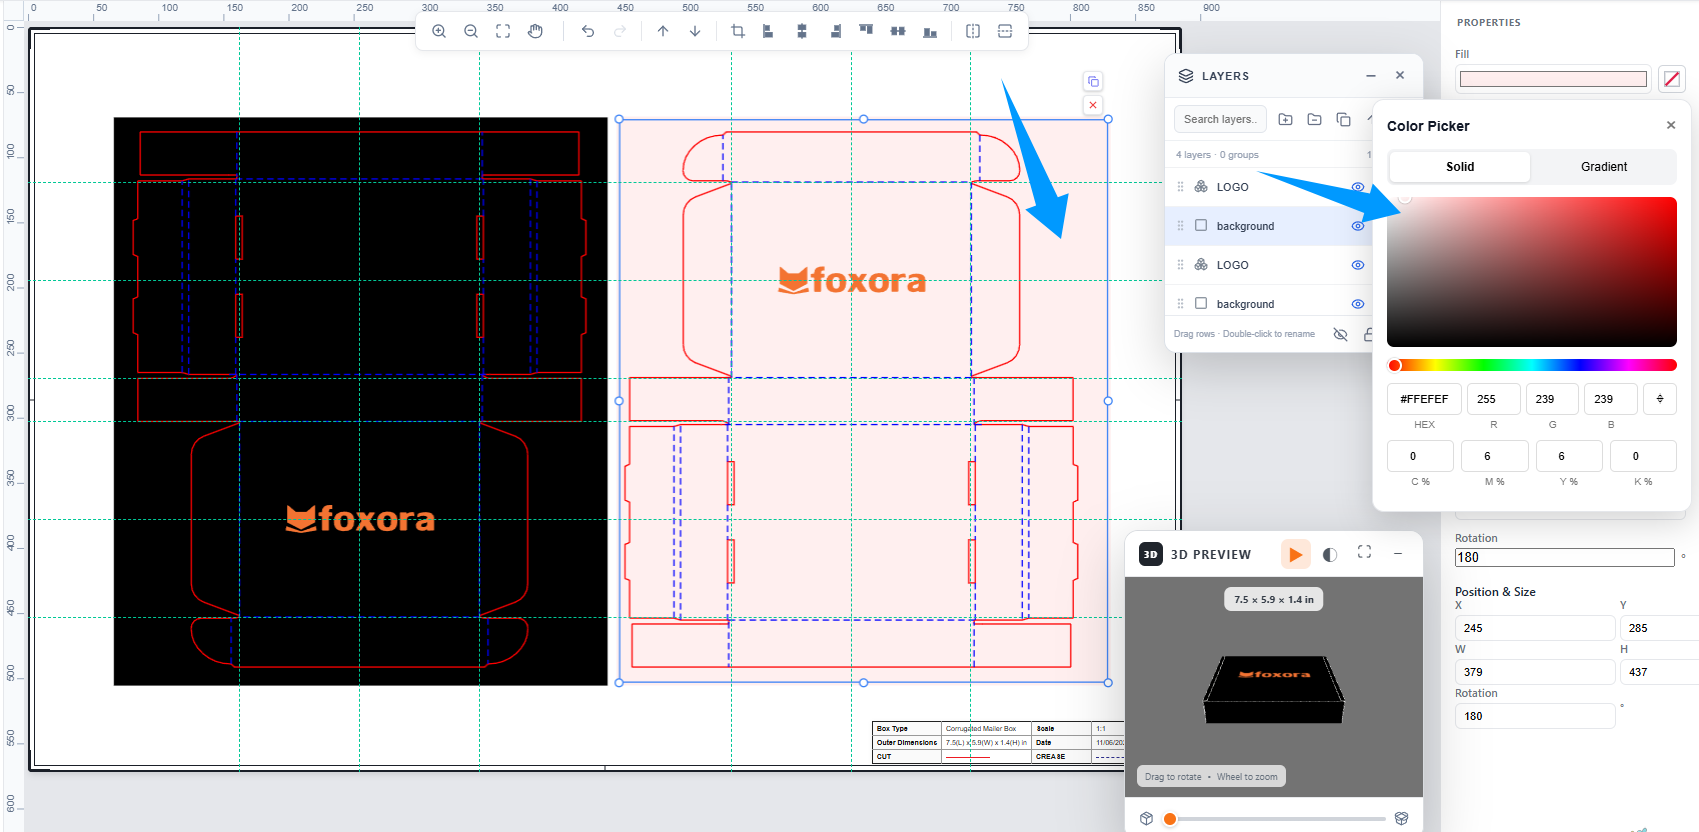
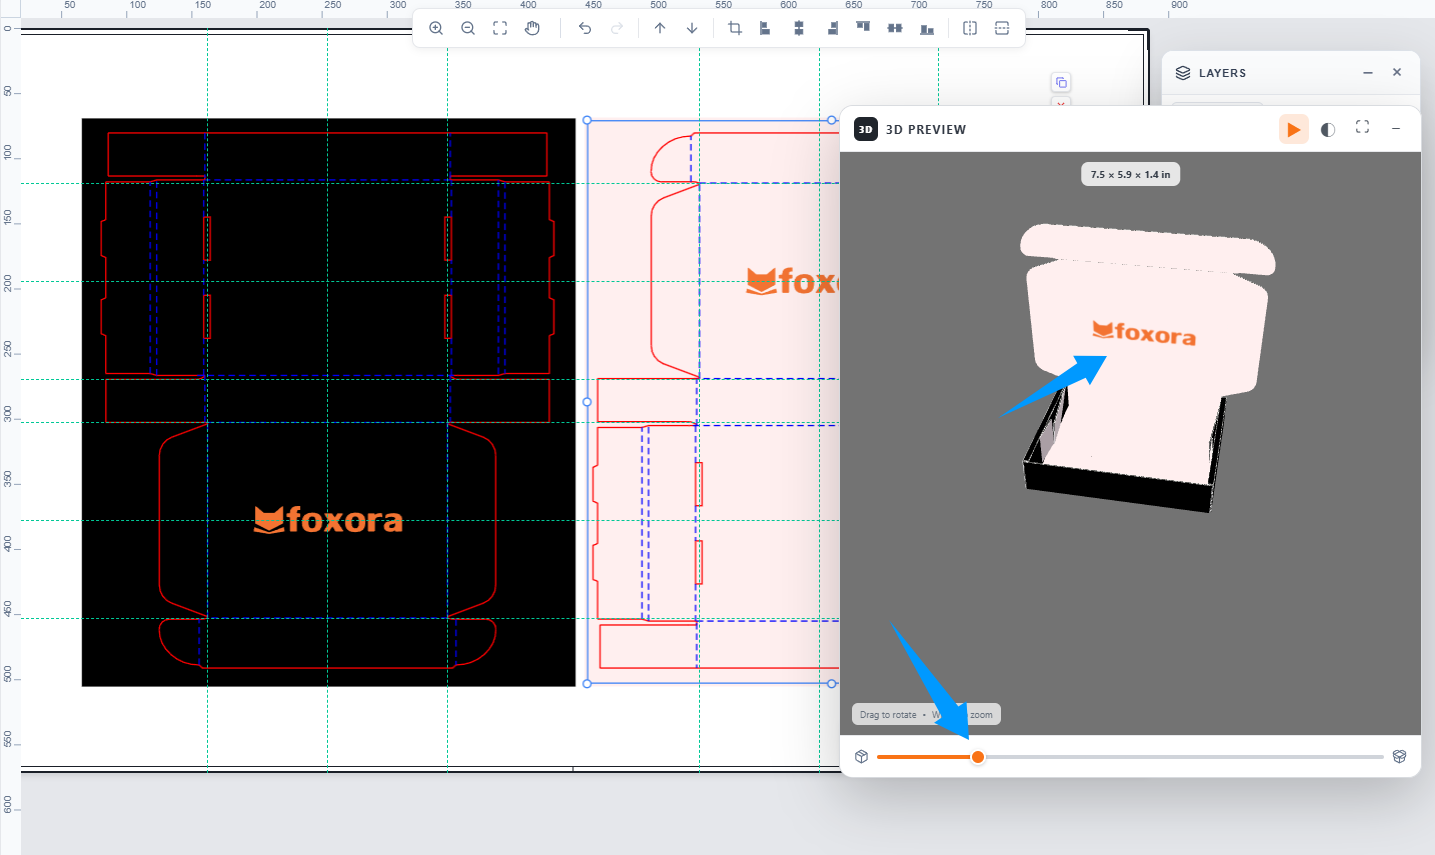
Duplicate the exterior background and move it onto the interior dieline on the right. Copy the logo and position it on the inside of the box lid. Then customize the interior background color.
Preview Your Mailer Box in 3D
Use the 3D Preview in the bottom-right corner of the editor to inspect your packaging design. Open and close the box to check how your artwork looks on both the exterior and interior surfaces.
Export Your Packaging Design
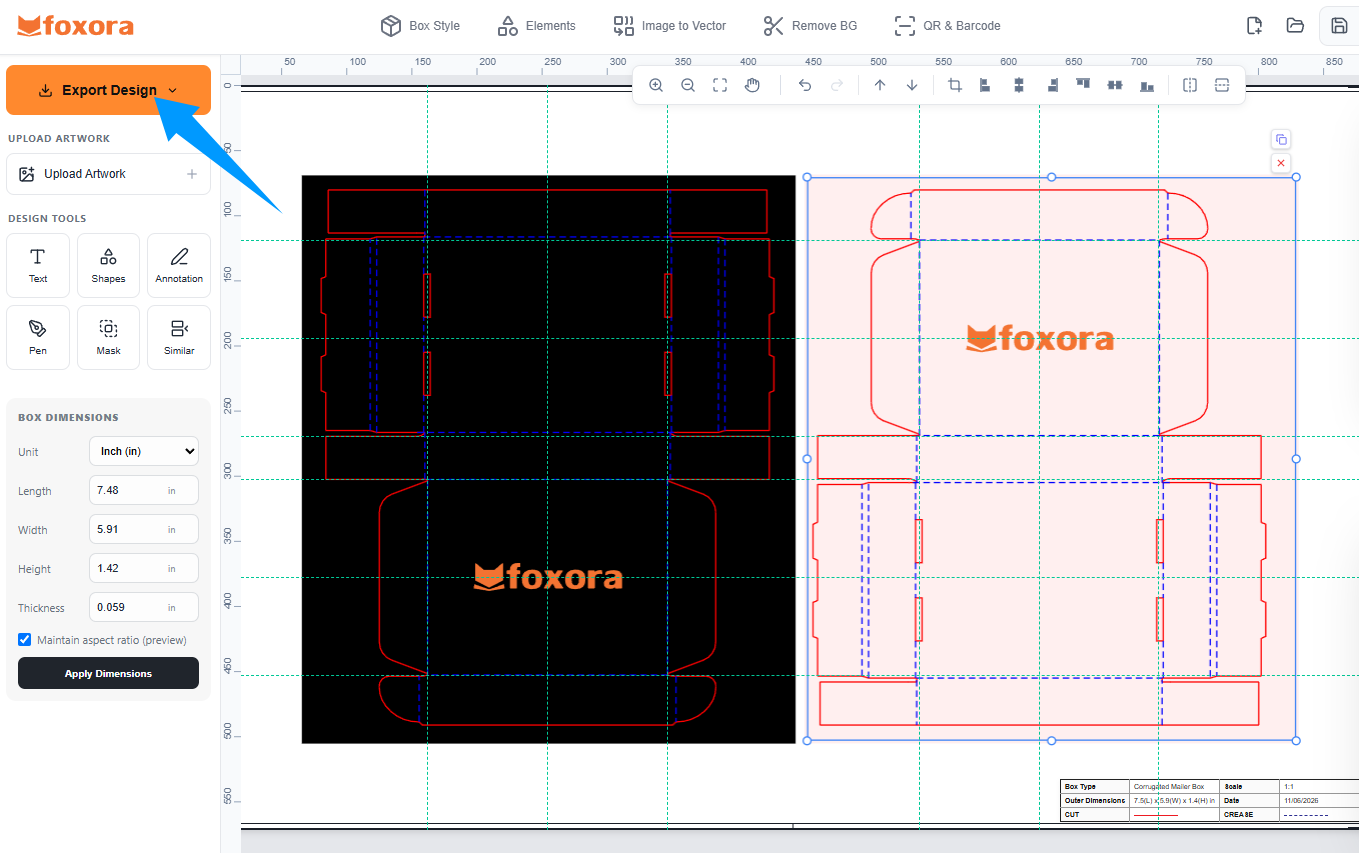
Once your design is complete, click Export in the top toolbar. Choose JPG or PNG for design previews. If you plan to print your packaging, export a PDF or AI (Adobe Illustrator) vector file for your printing provider.
Ready to Design Your Mailer Box?
Start creating your own custom mailer box with the Foxora online packaging editor.